


Intro
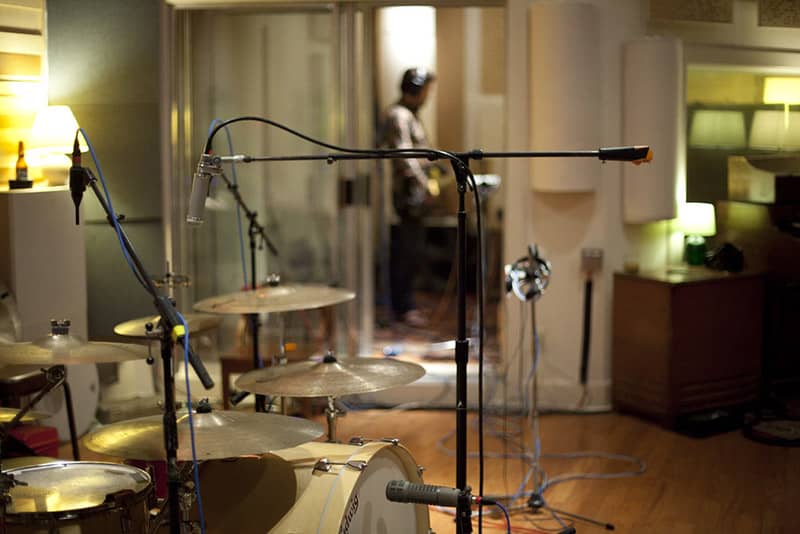
We drummers know that capturing the essence of our beats isn’t just about having mad skills on the sticks, it’s also about ensuring the world, or at least the recording room, can hear every nuance.
Whether you’re gearing up for a studio session, a live gig, or just want to record some beats in your garage, proper miking is essential. Not only does it bring out the best sounds from our drums, but it also shapes the overall sonic quality.
This guide will take you on a rhythmic journey, breaking down the process of miking a drum set step by step. As we progress through the article, we’ll get into the specifics of miking each component of a drum kit.
From the beefy thud of the kick drum to the crisp snap of a snare, we’ve got you covered. Plus, we’ll chat about the best mics for the job, explore miking techniques across various music genres, and offer some insider tips and tricks. So, grab your drum key, tune up those heads, and let’s dive into the world of drum miking.


How to Mic a Drum Set:
Table of Contents
Toggle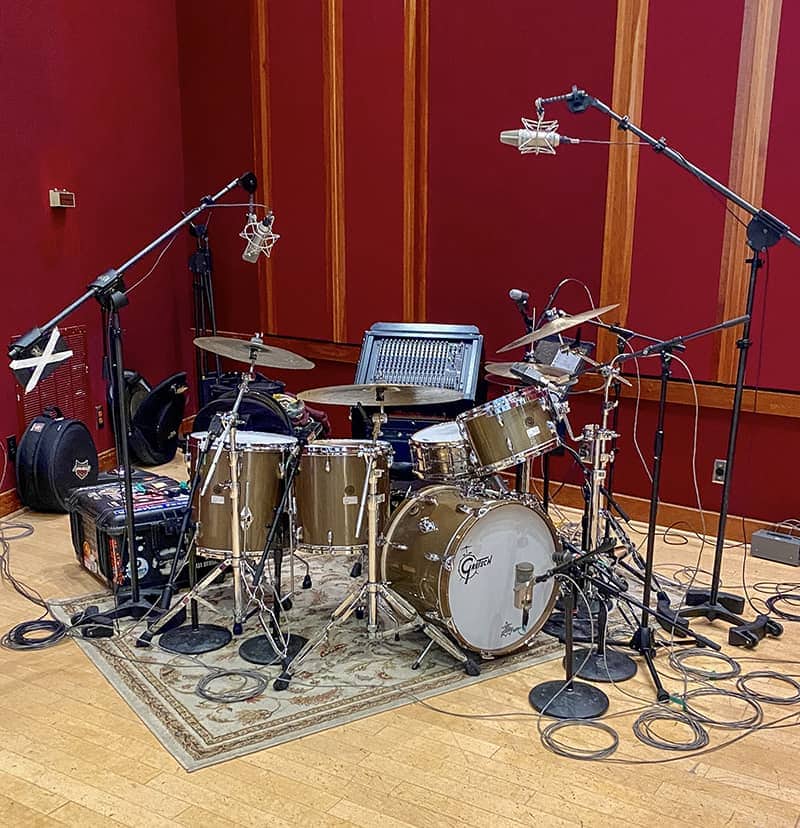
Every drummer knows that the sound of their kit is as unique as their fingerprint. But when it comes to recording or amplifying that sound, it’s crucial to understand how to mic each component correctly.
Each drum and cymbal has its distinct tone, and capturing that essence requires a bit of knowledge and technique. Let’s dive into the specifics of miking each part of your drum set.
Kick Drum
The kick drum, or bass drum, is the heartbeat of your drum set. Its low-end thump can make or break the sound, especially in genres that depend on a powerful bass punch.
Placement: Place a dynamic microphone inside the drum hole, aiming it slightly off-center towards the beater. This will capture the punch and attack. If you prefer more resonance, you can place another mic outside, about 6-8 inches away from the head.
Recommended Mic: Telefunken M82 or AKG D112 are industry favorites for their ability to capture the kick drum’s depth and punch.
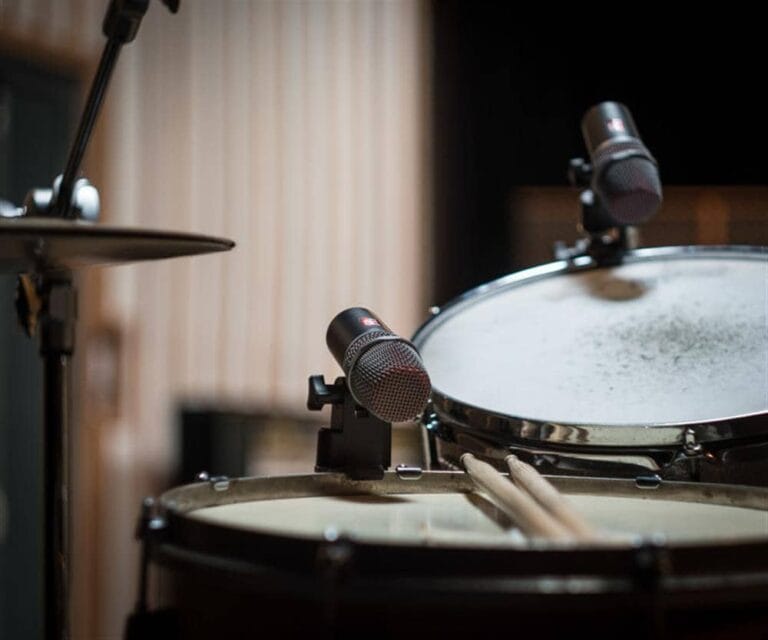
Snare Drum
The snare is the drum set’s voice, so it’s vital to get its mic placement just right to capture its distinctive crack.
Placement: Position a dynamic microphone, tilted at a 45-degree angle, about an inch away from the rim. Point it towards the center for a fuller sound or towards the edge for more overtones and ring.
Recommended Mic: Shure SM57 is a popular choice due to its durability and ability to handle the snare’s sharp transients. Or see or guide on recommended mics for snares.
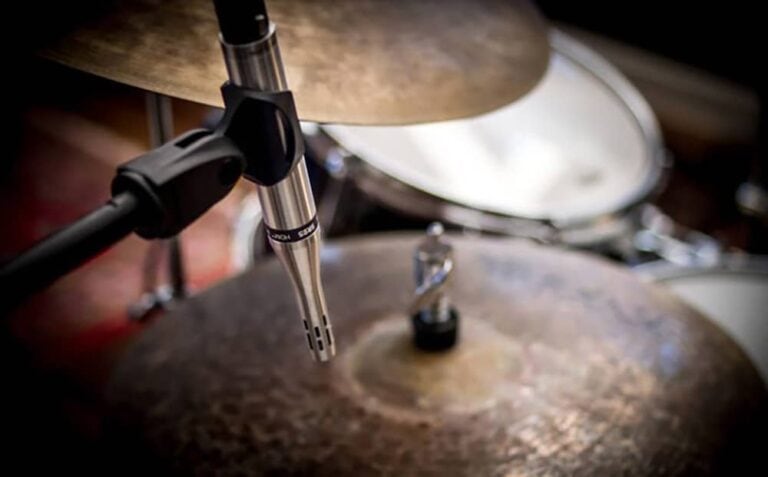
Overheads
Overhead mics capture the cymbals’ shimmer and the overall ambiance of the drum kit.
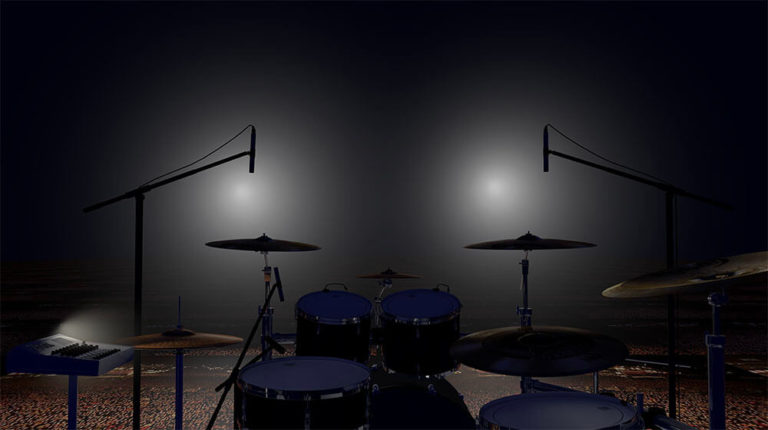
Placement: Use a pair of condenser mics positioned above the drum kit. The exact placement can vary based on preference, but a common technique is the spaced pair, where mics are placed about 2-3 feet above the cymbals and spaced apart.
Recommended Mic: sE Electronics sE8 or Telefunken M60 are known for their clarity and wide frequency response.
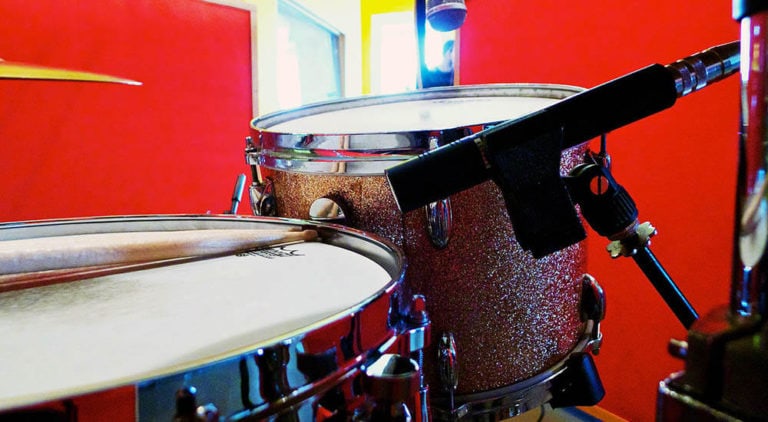
Toms

Toms add depth and rhythm to the drum’s melody, and each tom has its unique pitch and tone.
Placement: Place dynamic mics slightly above the tom heads, aiming them towards the center for a balanced tone.
Recommended Mic: Sennheiser MD421 or Audix D2/D4 are often chosen for their ability to handle the toms’ dynamic range. Or check our guide for the best tom mics.
Room
Room mics capture the drum kit’s ambiance and the natural reverb of the room.
Placement: Use one or two condenser mics, placed a few feet away from the drum kit, often at ear level or higher. This placement captures the room’s natural sound, adding depth to the overall mix.
Recommended Mic: Rode NT5 or Royer R-121 are preferred for their ability to capture room dynamics without compromising clarity.
As you navigate through the miking process, it’s essential to listen and adjust. Your drum kit, room acoustics, and even your playing style can influence the final sound. The guidelines provided here serve as a starting point, but always trust your ears. Adjust placements and experiment until you achieve the desired sound.
Also consider getting a Drum Mic kit if you are in a budget, well renown brands offer these packs with great mics on them. From high end packs to budget ones.

Choosing the Right Mics: Recommended Types of Mics for Drums
With so many options in the market, choosing the right microphones for your drum kit can seem daunting.
The type of microphone you choose is crucial because each is designed to capture specific drum sounds optimally. Here’s a breakdown of the recommended microphone types for various parts of your drum set:
1. Dynamic Microphones
Best for: Kick drums, snare drums, and toms.
Why? Dynamic mics are robust and can handle high sound pressure levels (SPL) without distortion. They are excellent for capturing the punch and attack of louder drums.
2. Small-Diaphragm Condenser Microphones
Best for: Hi-hats and cymbals.
Why? These mics are sensitive and provide a detailed, clear sound. They capture the sharp transients of cymbals and the delicate shimmer of a hi-hat perfectly.
3. Large-Diaphragm Condenser Microphones
Best for: Overheads and room ambiance.
Why? These mics have a broad frequency response and capture a wider sound, making them ideal for taking in the entire drum kit’s sound or the room’s ambiance.
4. Ribbon Microphones
Best for: Room ambiance and as overheads in specific genres like jazz.
Why? Ribbon mics offer a smooth vintage character, adding warmth and depth to the sound.
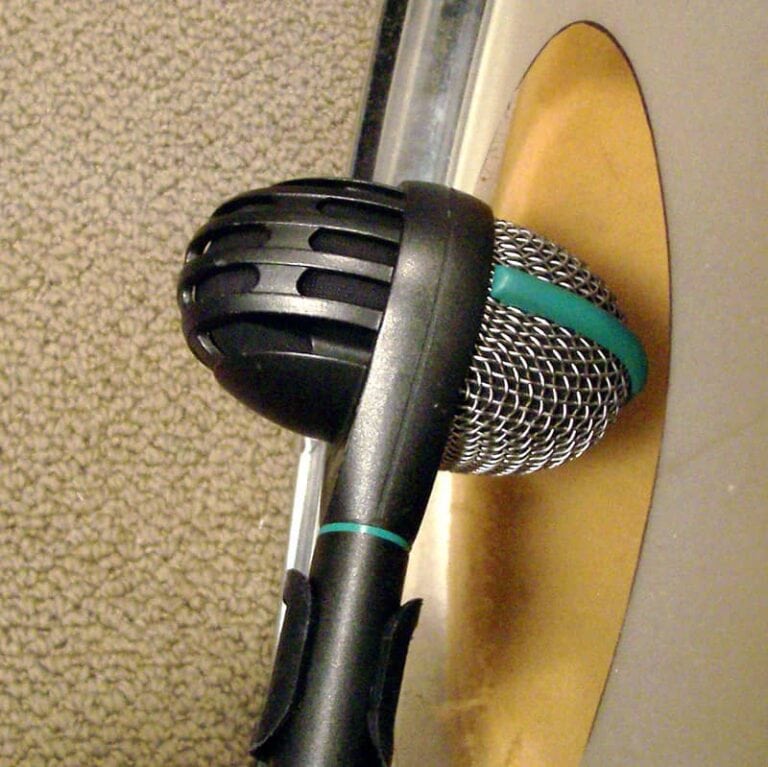
5. Boundary/PZM Microphones
Best for: Capturing the resonance from inside the kick drum or under the snare.
Why? These mics pick up sounds reflecting off surfaces, adding depth to the drum’s natural tone.
Recommendations:
The key to choosing the right microphone for your drum kit is understanding the sound you want to achieve. Whether you’re going for a classic rock punch or a jazz room’s ambiance, the right mic can make all the difference.
Always remember: while recommendations are great, your ears are the best judge.
Types of Miking for Different Drumming Genres
Every musical genre has its unique drum sound, and the miking technique plays a crucial role in capturing that essence. Here’s a breakdown of miking approaches tailored to various drumming genres:
Classic Rock
Essence: Punchy kicks, prominent snares, and crisp cymbals.
Technique: Use dynamic mics close to the kick and snare to get that punch. Overheads should capture both the cymbals and the general kit ambiance.
Tip: For a more vintage sound, consider ribbon mics as overheads or room mics.
Modern Rock
Essence: Defined lows, powerful hits, and a more polished overall sound.
Technique: Multi-miking is key. Each drum and cymbal gets its microphone, ensuring clarity and separation. Close-miking techniques help emphasize the power of each hit.
Tip: Enhance the room’s natural reverb with large-diaphragm condensers placed farther from the kit.
Jazz
Essence: Nuanced dynamics, subtler kicks, and the shimmer of ride cymbals.
Technique: Less is more. A good pair of overheads can often capture the entire kit, with maybe an additional mic for the kick and snare. Ribbon mics can add a warm vintage character.
Tip: Position overheads closer to the ride cymbal and snare, capturing the kit’s intricate patterns.
Indie Rock and Folk
Essence: Natural tones, softer hits, and an organic ambiance.
Technique: Focus on room mics to capture a more ambient sound. Use fewer mics and lean more towards condenser microphones for a brighter, airier tone.
Tip: Consider minimal miking techniques like the Glyn Johns method, using just a few mics to get a full kit sound.
The '70s
Essence: Warmth, deep grooves, and a bit of that vintage flair.
Technique: Emphasize the toms and kick with close miking. Use ribbon mics for warmth. Overheads should provide a blended sound of the cymbals and kit.
Tip: Tune your drums to get that ’70s resonance, and the mics will do the rest!
Country
Essence: Clear snare, tight kick, and a balance between the kit and other instruments.
Technique: Dynamic mics on the snare and kick for clarity. Overheads capture the cymbals without overwhelming the mix. It’s all about balance.
Tip: Mic the underside of the snare for added snare wire crispness, which fits perfectly in country tracks.
Remember, these are starting points to guide you. The beauty of drum miking lies in experimentation.
Each drummer, kit, room, and even song can require tweaks and adjustments. Always trust your ears, and don’t be afraid to break the “rules” to find the sound that resonates with you.
Steps to Set Up the Mics
Setting up drum mics may seem like a complex task, especially when faced with a jungle of stands, cables, and clamps. But with a systematic approach, it can be smooth sailing. Let’s break down the steps to efficiently set up mics for your drum kit:
1. Clear the Space & Plan Your Setup
- Ensure you have a clean area around your drum set.
- Lay out your microphones, stands, cables, and any other necessary gear.
- Visualize where each mic will be placed relative to the drum kit.
2. Start with the Kick and Snare
- These are typically the backbone of your drum sound, so get them right first.
- Position your kick mic inside or outside the drum hole, depending on the desired sound. Ensure it’s stable.
- Set up your snare mic tilted at about a 45-degree angle, focusing on the drum’s sweet spot.
3. Toms & Hi-Hat
- For toms, position dynamic mics above the drum heads, slightly angled toward the center.
- Set up a small-diaphragm condenser mic for the hi-hat, ensuring it’s not obstructing your playing.
4. Overhead Mics
- Determine your overhead technique – spaced pair, XY, ORTF, etc.
- Use tall boom stands to position the condenser mics above the drum kit. Aim to capture a balanced sound of cymbals and the overall kit.
5. Room Mics (If Applicable)
- Depending on your room’s acoustics and the sound you want, decide where to place room mics.
- Often, these are set at ear level or higher and a few feet away from the kit to capture the natural ambiance.
6. Cable Management
- Once all mics are in place, start running your cables.
- Use velcro ties or cable clips to keep them organized, preventing trips or accidental unplugging.
- Ensure cables aren’t touching the drum skins or causing any obstructions
7. Connect to the Audio Interface/Mixer
- Connect each microphone cable to your audio interface, mixer, or recording device.
- Label or note each input if not already done. This step is vital for easier mixing later.
8. Test Each Microphone
- Before diving into recording or a performance, test each microphone individually.
- Listen for any odd sounds, interference, or phase issues, especially with the overheads.
- Adjust mic positions as needed based on your initial sound check.
9. Lock Everything Down
- Ensure all mic stands are tightened and secure.
- Double-check the positions so that nothing will move during the performance or recording.
10. Final Sound Check
- Play a typical groove or song and listen back.
- Make any final tweaks to mic positions or levels, and you’re good to go!
Drum Miking Techniques
The art of drum miking is a fascinating realm. While the placement of mics around a drum kit might seem straightforward, the techniques and approach can greatly shape the final sound. Here’s a deeper dive into some key methods:
Close Miking:
This involves placing microphones close to individual drums and cymbals to capture their direct sound. It provides clarity and punch, making each drum stand out. Typically, dynamic mics are used for the snare, toms, and kick drum, positioned just a few inches away, while a small-diaphragm condenser might be best for the hi-hat.
Overhead Miking:
This technique uses condenser mics placed above the drum kit. The aim is to capture both the cymbals and an overall balance of the entire kit. There are different configurations such as the spaced pair, XY, and ORTF, each with its unique stereo imaging characteristics.
Room Miking:
This technique uses condenser mics placed above the drum kit. The aim is to capture both the cymbals and an overall balance of the entire kit. There are different configurations such as the spaced pair, XY, and ORTF, each with its unique stereo imaging characteristics.
Ambient Miking:
This is a step beyond room miking, emphasizing unique acoustic reflections. You might place mics in adjacent rooms, hallways, or even stairwells to capture an unconventional and atmospheric sound.
Glyn Johns Technique:
A classic and minimal method using as few as three microphones. One overhead above the snare, another by the floor tom, and a kick drum mic. The overhead and side mics remain equidistant from the snare, ensuring a balanced sound.
Recorderman Technique:
Another efficient approach using just two overheads plus kick and snare mics. One overhead is above the snare, and another hovers over the drummer’s shoulder. Maintaining equidistance from the snare is the key here.
Recorderman Technique:
For those looking to capture the deep resonance of drums, especially the kick, boundary or PZM mics can be placed either inside the drum or on its surface. This offers a unique perspective on the drum’s sound.
FAQ:
What is the best way to mic a drum set?
The “best” way to mic a drum set often depends on the context: the genre of music, the acoustics of the room, the drummer’s playing style, and the desired sound for the recording or performance.
However, a common approach is to use close miking for individual drums (snare, kick, toms, and hi-hat) combined with overhead mics to capture cymbals and the overall kit. Room mics can be added to capture ambiance. Always remember to consider the phase relationships between mics to ensure a clear sound.
What is the 3 to 1 rule for drum mics?
The 3 to 1 rule is a guideline to help avoid phase issues when using multiple microphones. Essentially, it states that the distance between two microphones should be at least three times the distance from each microphone to its respective sound source.
For example, if a microphone is 1 foot away from a snare drum, any adjacent microphone (say, for a hi-hat) should be at least 3 feet away from the first mic. This rule helps reduce comb filtering and phase cancellation, ensuring a cleaner recording.
Should I mic my drum set?
Miking your drum set is essential if you’re recording in a studio setting, playing in larger venues, or looking for a more controlled and refined sound during live performances.
Even in smaller venues or practice sessions, miking can help in achieving a balanced mix. However, in some intimate or acoustic settings, it might be unnecessary. Always consider the context and the sound you want to achieve.
How do you mic a drum set for live performance?
For live performances, clarity and feedback rejection are paramount. Here’s a basic approach:
- Kick Drum: Use a dynamic microphone, placed inside the drum hole or just outside, capturing the beater’s punch.
- Snare: A dynamic mic on the top, slightly angled towards the center, with another one underneath (optional) to catch the snares.
- Toms: Dynamic mics positioned above, angled towards the center of the drum.
- Hi-Hat: A small-diaphragm condenser mic positioned a few inches above, pointing down towards the edge.
- Overheads: Condenser mics capturing the overall cymbal spread and kit ambiance.
- Room Mics: Optional, but can add a live feel by capturing the audience and overall room sound.
- Ensure all mics have minimal bleed from adjacent instruments, and always sound check to balance levels and EQ for the best mix.
Summary
Miking a drum set is both an art and a science. From the intimate nuances of a jazz trio to the thunderous presence of a rock band, how you capture that drum sound can profoundly influence the final mix.
It’s not just about placing mics near drums; it’s about understanding the character of each drum, the ambiance of the room, and the final sound you’re aiming to achieve.
Whether you’re a novice setting up mics for the first time or a seasoned professional, remember that experimentation is key. Techniques and gear will evolve, but the pursuit of that perfect drum sound remains a constant journey.