


Intro
Capturing the raw energy of drums in a studio recording can be a thrilling challenge. In this guide, I’ll walk you through the essentials of recording drums, offering straightforward, no-nonsense advice that’s particularly relevant on today’s recording landscape.
From selecting the right equipment to fine-tuning your setup for that perfect sound, I’ll cover all the bases.
This guide is for anyone who’s ever felt the urge to immortalize their drumming in a recording that sounds as good as it feels to play.
Ready to make some beats? Let’s get into it.


Table of Contents
ToggleHow to Record Drums

1. Prepare the Space
Creating the perfect space for drum recording is a blend of art and science. Here’s how you can set up your recording environment to capture the best possible drum sound:
Room Acoustics:
The first step is to understand your room’s acoustics. Aim for a space that neither echoes too much nor sounds too dampened. Often, a medium-sized room strikes the right balance. In a home studio, living rooms can be surprisingly effective.
Soundproofing:
Now, let’s minimize external noise and control internal sound reflections. You don’t need to go overboard, simple fixes like heavy curtains, rugs, or foam panels can make a significant difference.
The goal is to create a controlled sound environment without turning your space into a fortress.
Drum Positioning:
The placement of your drum kit within the room is crucial. Steer clear of the dead center, a spot about a third into the room generally works better. Also, give your kit some breathing room from the walls to prevent sound bounce-back.
Comfort and Lighting:
Ensure the space around your drum kit is comfortable and spacious enough for easy movement. Good lighting is equally important, it should be bright enough to see clearly but not so intense that it causes glare or shadows.
Ventilation:
Remember, drumming can be intense, so adequate airflow is essential. However, be mindful of any noise that might come from air conditioners or heating systems.
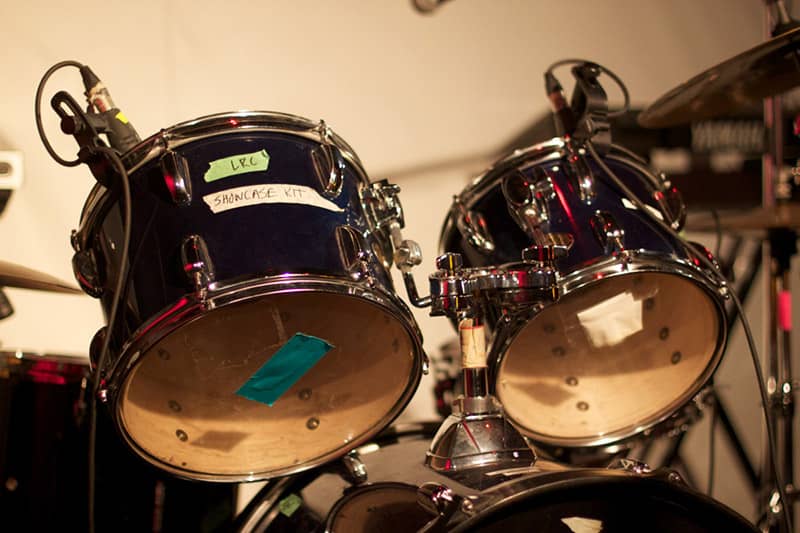
2. Setting up the drums
When it comes to drum recording, how you set up your kit plays a pivotal role in the quality of your sound. Let’s break down the essentials of drum setup for recording:
Tuning Your Drums:
The soul of your drum sound lies in how well they’re tuned. Take your time to tune each drum, ensuring they sound clear and resonate well.
Remember, what sounds good in a live setting might not translate the same in a recording. Adjust the tuning to eliminate any unwanted overtones or buzzing.
Drum Heads and Dampening:
Fresh drum heads can bring new life to your sound. If you’re dealing with unwanted ring or overtones, consider using dampening techniques. Moon gels, small pieces of tape, or even wallet placement on a snare drum can help control these overtones.
Cymbal Considerations:
Cymbal placement is crucial. Position them so they’re easily reachable but not so close that they bleed into the drum mics excessively. Be mindful of the angles to reduce the chances of overbearing crash sounds in your mics.
Kick Drum:
For kick drums, internal dampening can help achieve a tight, punchy sound. You can use a pillow or specially designed drum dampeners.
Also, consider the beater type, a felt beater gives a softer thump, while a plastic or wooden beater offers a more pronounced click.
Snare Drum Tweaks:
The snare often requires extra attention. Play around with the snare wire tension to find the right balance between sensitivity and buzz.
Hardware Stability:
Ensure all stands and hardware are stable and won’t rattle or cause noise during recording. This can be a source of unwanted noise in your tracks.
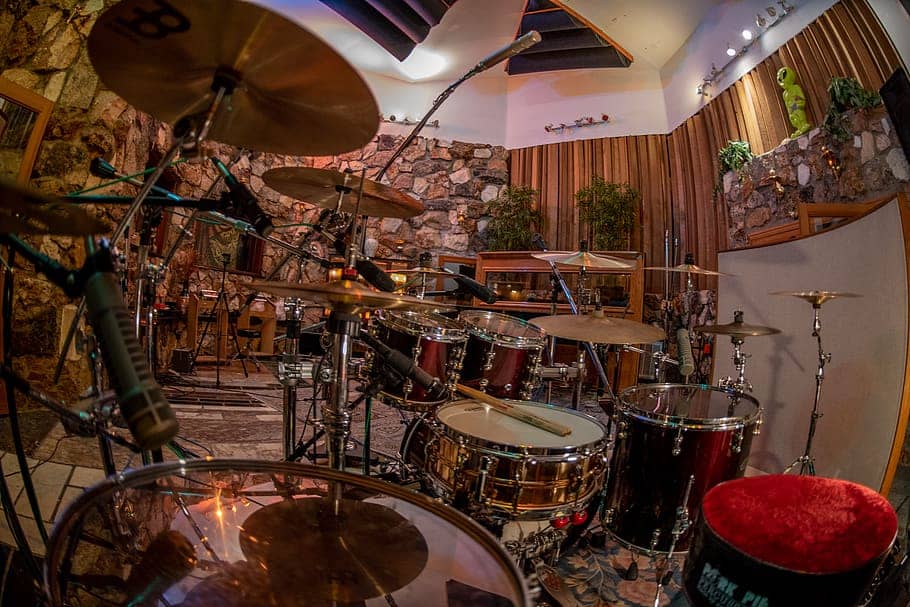
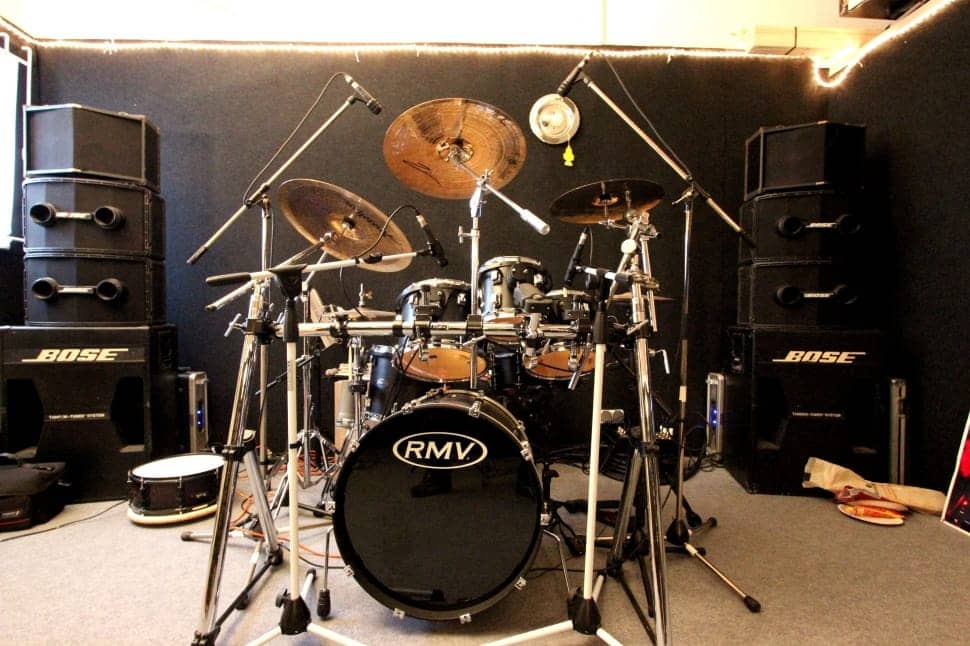
3. Placing the Mics
Mic placement is a key factor in capturing the true character of your drum sound. Let’s explore how to strategically place mics to get the best out of your drum kit:
Kick Drum Mic Placement:
Start with the kick drum. A common approach is to place a large-diaphragm dynamic mic just inside the hole of the kick drum, aiming towards where the beater hits. This position captures the attack and the boom. If you want more of the natural resonance, try placing a mic a few inches outside the drum.
Snare Drum Miking:
For the snare, a dynamic mic placed a few inches above the top head, angled slightly towards the center, works well. This captures the crack of the snare. You can also place a mic beneath the snare to pick up the sizzle of the wires, blending it with the top mic in your mix.
Tom Mic Techniques:
Toms can be miked with dynamic mics positioned a few inches above the head, angled towards the center of the drum. This captures both the attack and the body of the tom sounds.
Overhead Mics for Cymbals:
Overhead mics are crucial for capturing the overall picture of the kit, especially cymbals. Condenser mics work well here, placed above the kit, ensuring they capture the spread of your cymbals and a bit of everything else.
Room Mic for Ambience:
Don’t forget a room mic. A well-placed room mic (or a stereo pair) can capture the natural reverberation and ambiance of your drum sound, adding depth to your recording.
Experimentation is Key:
The best mic placements often come from experimentation. What works in one room with one drum kit might not work in another situation. Don’t be afraid to move mics around and listen to how the sound changes.
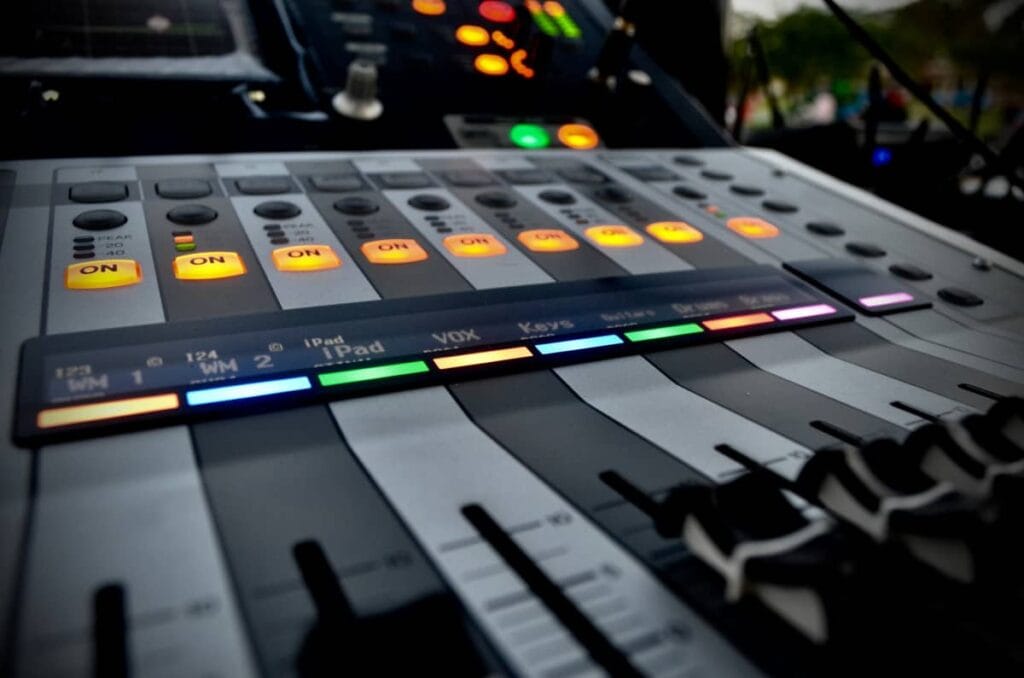
4. Connecting the Hardware – Audio Interfaces and Preamps
Once your mics are in place, it’s time to connect them to your recording setup.
This involves using audio interfaces and preamps, which are critical for translating your acoustic drum sounds into high-quality digital signals for recording.
Choosing the Right Audio Interface:
The audio interface is the heart of your home studio. It’s essential to choose one that can handle the number of mics you’re using.
Look for an interface with enough mic preamps to accommodate each drum mic. Also, consider the quality of the A/D conversion, this affects how accurately your drum sounds are digitized.
Using External Preamps:
While many audio interfaces come with built-in preamps, using external preamps can give you more control and potentially higher quality.
External preamps can add character and warmth to your drum sounds. They also offer more detailed control over gain staging and tone shaping.
Connecting Mics to Preamps:
Connect each drum mic to a preamp. If you’re using an interface with built-in preamps, this means plugging the mics directly into the interface.
For external preamps, you’ll run each mic into the preamp first, then connect the preamp’s output to your interface.
Gain Staging:
Once everything is connected, set the gain levels on each channel. You want to capture the full dynamics of your drums without clipping.
Start with lower gain settings and slowly bring them up while playing the drums at their loudest. Watch the interface’s meters to ensure you’re not going into the red (clipping).
Checking Phase Coherence:
With multiple mics, phase issues can arise. Check for phase problems by listening to your drum mics in pairs (especially important for overheads and close mics).
If the sound becomes thin or hollow, try reversing the phase on one mic in the pair.
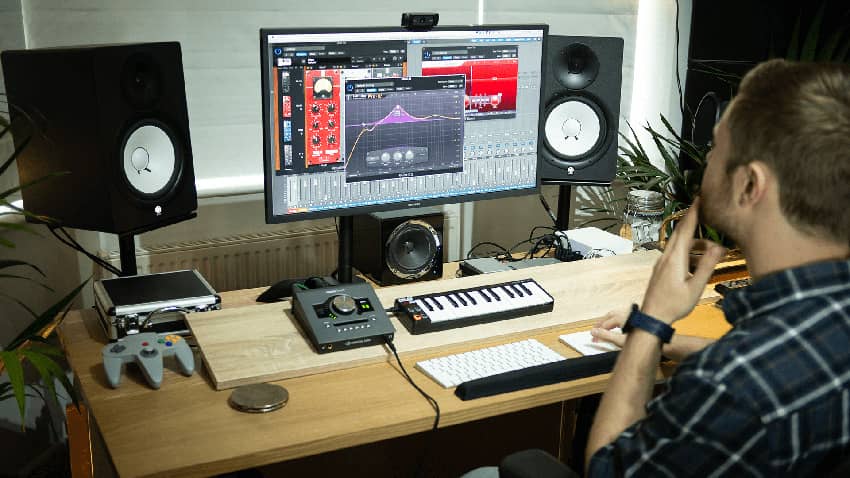
5. Selecting Your DAW
The Role of a DAW in Drum Recording
You will requeire a reliable Digital Audio Workstation (DAW). This software acts as your command center, handling everything from recording to editing and mixing your drum tracks.
Your choice here can significantly influence the ease and quality of your recording experience.
What to Look For in a DAW
- Ease of Use: An intuitive interface is crucial, especially if you’re new to digital recording. Opt for a DAW that simplifies your workflow with a user-friendly design.
- Compatibility Matters: Your chosen DAW must play well with your existing hardware setup and computer operating system. This compatibility is key to avoiding technical hiccups.
- Feature-Rich for Drum Recording: Seek out a DAW that excels in live instrument recording. Essential features include robust multi-track recording capabilities, a comprehensive mixer, and versatile editing tools.
- Exploring Options: Industry favorites like Pro Tools and Logic Pro (for Mac users) are popular for good reasons. But don’t overlook contenders like Ableton Live and Reaper, each offering unique strengths.
- Budget-Friendly Choices: While free DAWs like Audacity are great for beginners, investing in a paid version often unlocks advanced features and better technical support.
- Community Support: A strong user base and reliable customer support can be lifesavers, offering resources for learning and troubleshooting.
Making the Choice
Your DAW is more than just software is a crucial tool on your recording process. Spend time experimenting with different options (many of which offer free trials) to find the one that resonates with your style and needs.
The right DAW not only simplifies your recording process but also empowers you to bring out the best in your drum tracks.

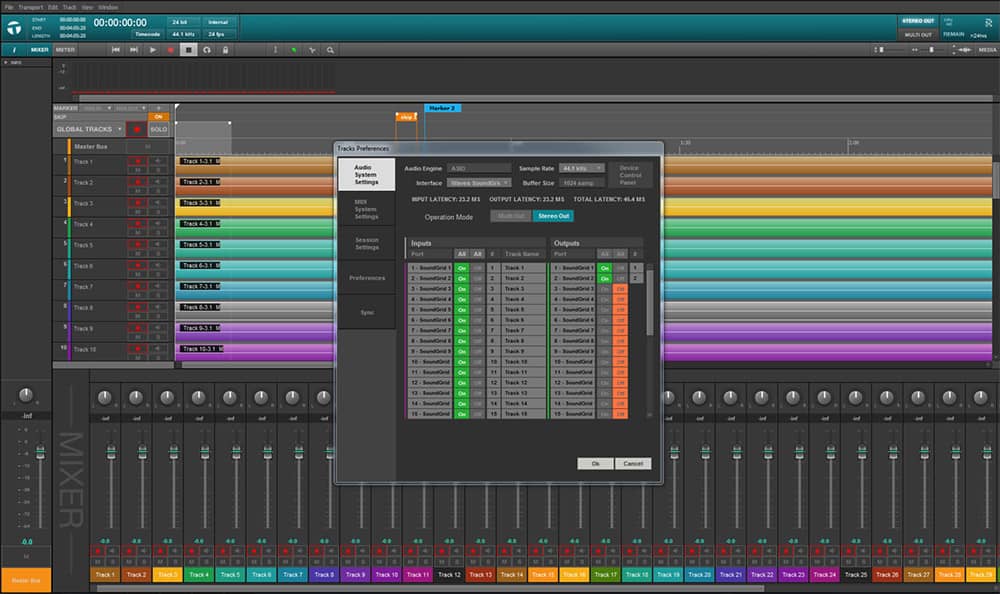
6. Setting Up the Session File in Your DAW
Setting up your session file in the DAW is a crucial part to have everything in place, here’s how to do it effectively:
1. Establishing Track Layout:
Begin by creating individual tracks for each element of your drum kit – kick, snare, toms, overheads, and room mics.
Labeling each track clearly (like “Snare Top,” “Kick In,” etc.) helps in easy navigation during the recording and mixing phases.
2. Setting Sample Rate and Bit Depth:
Choose the right sample rate and bit depth for your project. A standard setting is 44.1kHz for the sample rate and 24-bit for bit depth, offering a good balance between sound quality and file size.
3. Tempo and Time Signature:
If your drum parts are to a click track or need to align with other pre-recorded tracks, set the correct tempo and time signature at the beginning. This ensures everything stays in time and makes editing easier later.
4. Creating a Click Track:
A click track is invaluable for keeping time, especially during complex passages or if you plan to add more instruments later.
Most DAWs have a built-in metronome that you can customize to your needs.
5. Preparing for Recording:
Check your input levels and ensure each mic is correctly routed to its respective track. Do a quick test recording to confirm everything is working as expected.
6. Save and Backup:
Regularly save your session and consider setting up automatic backups. Losing data during a recording session can be frustrating and time-consuming.
7. Customizing the Workspace:
Many DAWs allow you to customize the workspace. Arrange the mixer, track view, and other panels in a way that feels intuitive and accessible to you.
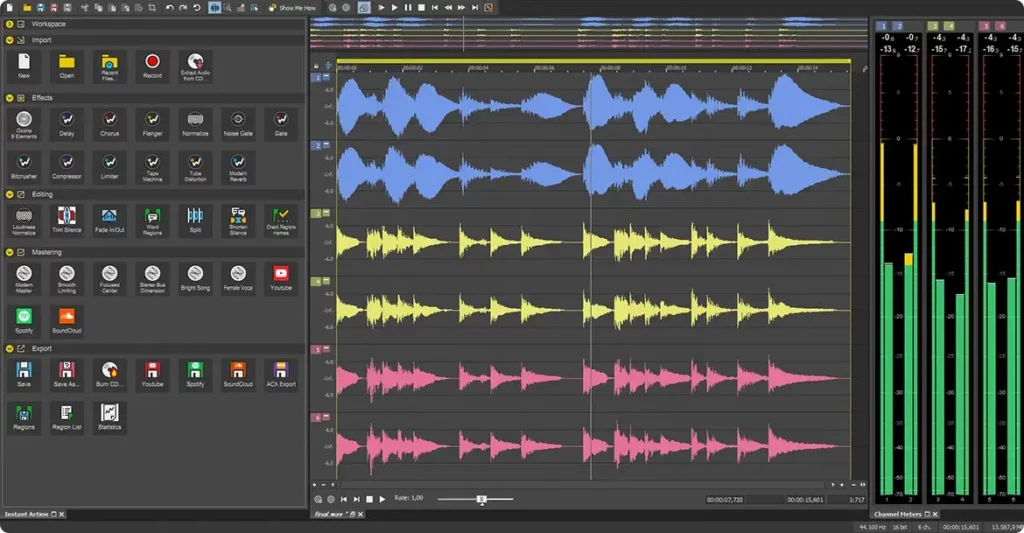
7. Make a Mix - Crafting the Sound of Your Drums
Mixing is where you bring your recorded drum tracks to life, transforming them from raw sounds into a polished, cohesive unit.
This process is both technical and creative, requiring a keen ear and a clear vision for your drum sound. Let’s dive into the key steps:
Balancing Levels:
Start by adjusting the levels of each drum track. The goal is to create a balanced sound where each drum is clearly audible without overpowering the others.
Pay special attention to the relationship between the kick, snare, and overheads, as these often form the backbone of your drum mix.
EQ and Filtering:
Use EQ to sculpt the sound of each drum. Remove any unwanted frequencies, like low-end rumble on cymbal tracks or boxiness on the snare.
Boosting certain frequencies can help drums stand out in the mix. For instance, adding some punch to the kick or clarity to the snare.
Applying Compression:
Compression is vital in drum mixing. It helps to even out the dynamics, giving your drums a consistent level.
Be cautious not to over-compress, as this can suck the life out of your drums. Use compression to add punch, tighten up the sound, and control the transients.
Adding Reverb and Effects:
Reverb can add depth and space to your drum sound. Use it sparingly to avoid washing out your drums.
Other effects like delay or saturation can be used creatively to add character or emphasize certain parts.
Panning for a Natural Feel:
Panning your drums can create a sense of space and realism. Imagine how a drum kit is typically set up and pan your tracks accordingly.
This helps in creating a mix that feels natural and immersive.
Listening and Tweaking:
Mixing is an iterative process. Take regular breaks to rest your ears, and listen to your mix on different sound systems to see how it translates. Be open to making adjustments until you find the right balance.
8. Edit – Fine-Tuning Your Drum Tracks
Editing is a crucial stage in the drum recording process, where you refine and perfect your tracks.
It involves adjusting the timing, cleaning up the tracks, and ensuring everything sounds tight and cohesive. Let’s break down the key steps in editing your drum recordings:
Aligning and Tightening Timing:
Even the best drummers can have slight timing discrepancies. Use your DAW’s tools to align drum hits more precisely, especially if they’re meant to sync with other instruments. Be careful not to overdo it, maintaining a natural feel is important.
Cleaning Up Tracks:
Remove any unwanted noise, such as stick clicks or hardware rattles, that may have been picked up during recording. This can be done using gate plugins or manual editing.
Correcting Phase Issues:
With multiple mics, phase cancellation can be an issue, especially between close mics and overheads. Listen for any thin or hollow sounds and adjust the phase of the mics accordingly.
Drum Replacement or Layering (if needed):
In some cases, you might want to replace or augment certain drum sounds with samples.
This is common in modern music production to achieve a particular sound or add more punch.
Using Automation for Dynamic Control:
Automation can be used to adjust volumes of certain sections or hits, bringing out fills or cymbal crashes, and ensuring a dynamic and engaging drum track.
Adding the Final Touches:
Sometimes, subtle EQ tweaks or slight compression adjustments during editing can make a big difference in the final mix.
9. Mastering: The Final Touch for Your Drum Tracks
Mastering is the final step in the drum recording process, where you fine-tune the overall sound to ensure it’s cohesive, balanced, and ready for listeners.
This stage is about adding the final polish to your tracks, making sure they sound great on any system. Here’s how to approach mastering your drum recordings:
1. Consistency Across Tracks:
If you’ve recorded multiple drum tracks or songs, ensure there’s consistency in volume, tone, and overall sound. This uniformity is key in a professional-sounding record.
2. EQ for Balance and Clarity:
Use mastering EQ to balance the frequencies. It’s about subtle adjustments to ensure your drums sound clear and defined in the mix, without any muddiness or harshness.
3. Apply Compression Wisely:
Mastering compression is different from mixing compression. It’s about gently gluing the tracks together for a cohesive sound, rather than altering dynamics significantly.
4. Enhance Stereo Width:
If applicable, you can subtly enhance the stereo width to give your drums a fuller, more immersive sound.
Be cautious, as too much widening can lead to a loss of focus and power.
5. Loudness and Peak Limiting:
Aim for a competitive loudness level without sacrificing dynamic range. Use peak limiting to prevent clipping and to achieve the desired loudness, especially important in today’s streaming-centric music world.
6. Quality Checks:
Listen to your mastered tracks on different sound systems, headphones, car stereos, home speakers, to ensure they translate well across all platforms.
7. Final Formats:
Export your final master in the necessary formats (e.g., WAV for high-quality, MP3 for distribution) and bit rates.
FAQ:
What is the best way to record drums?
The best way to record drums involves creating a balance between room acoustics, drum preparation, microphone placement, and the use of quality recording equipment. Mixing and mastering play a pivotal role in refining the final sound.
How do I record drums on my computer?
To record drums on your computer:
- Connect your drum mics to an audio interface.
- Ensure the interface is connected to your computer.
- Open a DAW on your computer and create a new session.
- Assign each mic to a separate track in the DAW.
- Record each drum part, adjusting levels and settings as needed.
- Edit, mix, and master within your DAW for the final sound.
How do artists record drums?
Professional artists typically record drums in a studio setting equipped with high-quality microphones, sophisticated audio interfaces, and preamps.
They pay close attention to room acoustics and mic placement to capture the best sound. The process involves extensive use of professional DAWs for intricate editing, mixing, and mastering to achieve a polished final product.
Summary
Mastering drum recording is a journey that blends technical know-how with creative flair. Whether you’re in a makeshift home studio or a professional setup, the essence lies in understanding your space, selecting the right gear, and dedicating time to each stage of the process.
From tuning your drums to perfect mic placement, from detailed editing to meticulous mastering, each step is a vital piece of the puzzle.
Remember, the aim is not just to record drum sounds but to capture the energy and emotion they convey.
If you are using a electronic drum kit the process is a bit simpler, you can check our guide on recoding e-drums here.
Each recording session is a learning experience, so embrace the process, experiment, and grow. May your drum recordings always be as vibrant and dynamic as your performances.
Happy drumming and recording!