
How to Record Electronic Drums
6 Methods
I want to be straight with you: recording electronic drums is one of the most forgiving things you can do as a drummer.
No mic placement headaches. No room treatment required. No engineer looking over your shoulder telling you the snare sounds like a cardboard box.
I’ve recorded acoustic kits in full pro studios and there are times I’d rather plug in an e-kit and get to work in five minutes. The results, especially when you’re using MIDI with good VSTs, can genuinely blow people away.
In this guide I’m going to walk you through every method I actually use and recommend, from dead-simple USB recordings to professional-grade MIDI setups that make even a budget Roland or Alesis kit sound like a $10,000 custom build.
Let’s get into it.
Quick Overview
What You'll Need
Before we dive into the steps, here's what the recording chain looks like depending on which method you choose:
| Method | What You Need | Skill Level | Sound Quality |
|---|---|---|---|
|
|
USB cable
DAW
|
Beginner
|
|
|
|
Interface
TRS / XLR cables
DAW
|
Beginner–Intermediate
|
|
|
|
Interface with multiple inputs
TRS cables
DAW
|
Intermediate
|
|
|
|
USB cable or MIDI interface
DAW
VST plugin
|
Intermediate
|
|
|
|
USB-to-phone adapter
Mobile DAW
|
Beginner
|
|
Don't worry — I'll explain exactly what each one means and when to use it below.
How To record Electronic Drums

Method 1: USB Direct to Your DAW (The Easiest Starting Point)
This is the first method I recommend to every drummer who’s just getting into recording. It’s the fastest setup and requires the fewest pieces of gear.
How it Works
Your drum module has a USB port on the back. That single cable does two jobs simultaneously, it can send both audio and MIDI data to your computer.
Most modern Roland, Yamaha, and Alesis modules support this.
Step-by-step:
1. Connect the USB cable from the back of your drum module to your computer.
2. Install the driver (if required). Roland modules typically need their driver installed first, grab it from Roland’s website. Alesis modules are often plug-and-play on Mac and Windows 10/11.
3. Open your DAW and create a new audio track.
4. Set the input on that track to your drum module (it’ll appear as a new audio device in your DAW).
5. Check your levels. Play your kick, you want the meter hitting around -12 to -6 dB. Anything peaking into the red will sound terrible.
6. Hit record and play.
Ninja tip: When recording audio via USB, you’re capturing the processed sound from the module, effects, EQ, reverb and all. If you want a clean, dry signal to mix later, go into your module’s settings and dial back the ambience and reverb before recording.
You can always add it back in the DAW, but you can’t remove it once it’s baked in.
Best DAWs for USB recording:
– GarageBand (Mac/iOS — free, excellent for beginners)
– Audacity (Windows/Mac/Linux — free, simple, reliable)
– Reaper (Windows/Mac — $60 license, extremely powerful)
– Logic Pro (Mac — $199, the pro standard for home studios)
– Ableton Live (Windows/Mac — industry favourite for electronic music)
Method 2: Audio Interface Recording (Better Sound, More Control)
Once you start caring about sound quality and trust me, you will, an audio interface is the move. (and a good pair of headphones)
An audio interface is a small box that converts the analog signal from your drum module into high-quality digital audio. Think of it as a much better sound card for your computer.
What you need:
– An audio interface (I’ve used the Focusrite Scarlett range for years and recommend the 2i2 for simple stereo recording, or the 18i20 if you want multi-channel).
– TRS (stereo jack) or XLR cables depending on your module’s outputs.
– Your DAW.
How it Works
Most drum modules have a stereo main output, a left and right jack on the back.
You connect those two outputs to two inputs on your audio interface using TRS cables. The interface then connects to your computer via USB.
Step-by-step:
1. Connect your module’s L/R outputs to inputs 1 and 2 on your audio interface using TRS cables.
2. Connect the interface to your computer via USB (or Thunderbolt on some models).
3. Open your DAW and create a new stereo audio track.
4. Set the input to inputs 1-2 on your interface.
5. Gain-stage properly, use the interface’s gain knobs to set levels.
Aim for -12 to -6 dB on your loudest hits.
6. Record.
Why this sounds better than USB audio:
The audio interface has dedicated analog-to-digital converters (ADCs) that are significantly higher quality than the cheap ones built into most computers. You’ll get lower latency, less noise, and a cleaner signal overall.
Important note: When you record stereo audio this way, the whole kit is baked into one stereo file. You can’t go back and adjust the kick level independently from the snare.
This is why I recommend disabling the module’s internal effects before you record, keep it dry, and do your processing in the DAW where you have full control.
Decide on audio recording for real drum sounds or MIDI for capturing drum data. Audio records the sound, MIDI records how you play.

Claim Your FREE 7-Day Trial
Unlock the tools and resources to make consistent progress in your own development as a drummer with The Drum Ninja Online Drum School platform today - click the button below to get started for FREE now.
Method 3: Multi-Channel Recording (The Pro Setup)
This is where things get seriously powerful and it’s something most beginner guides skip entirely.
Many mid-to-high-end drum modules (Roland TD-17, TD-27, Yamaha DTX6 series) have individual outputs in addition to the stereo main.
This means you can route the kick to one input, the snare to another, the hi-hat to another, and so on, recording every element of the kit on its own separate track.
Why does this matter?
Because it gives you the same mixing power you’d have if you recorded an acoustic kit with 10 microphones. In post, you can:
– Compress the kick without affecting anything else
– Add reverb to just the snare
– Fix timing on the hi-hat independently
– Pan each element exactly where you want it in the stereo field
What you need:
– A drum module with individual outputs (check your manual)
– An audio interface with enough inputs (Focusrite 18i20, MOTU 8M, Universal Audio Apollo 8, etc.)
– TRS cables for each individual output
– A DAW that supports multi-track recording
This setup requires more cables and more configuration, but the results are genuinely professional.

Method 4: MIDI Recording + VST Plugins (This Changes Everything)
Alright. This is the method that gets me genuinely excited and the one that most people underestimate when they’re starting out.
MIDI stands for Musical Instrument Digital Interface. When you record MIDI from your e-kit, you’re not recording sound at all. You’re recording *data*, which pads you hit, how hard you hit them, and exactly when.
That data gets sent to a VST (Virtual Studio Technology) plugin a piece of software that generates the actual drum sounds. And the quality of those sounds?
Let me put it this way: I’ve heard MIDI recordings through top-tier VSTs that professional engineers couldn’t distinguish from a real acoustic kit recorded in a world-class studio.
The Best Drum VST's
– Superior Drummer 3 (Toontrack) — the industry standard. Insane level of detail, multiple kit options, feels expensive because it is and is worth every cent.
– EZdrummer 3 (Toontrack) — more beginner-friendly, still sounds amazing.
– Steven Slate Drums — affordable, excellent sounding, great for rock and metal.
– GetGood Drums — popular with the metal and prog crowd. Realistic, punchy, and detailed.
– BFD3 — deep customisation, studio-quality samples.
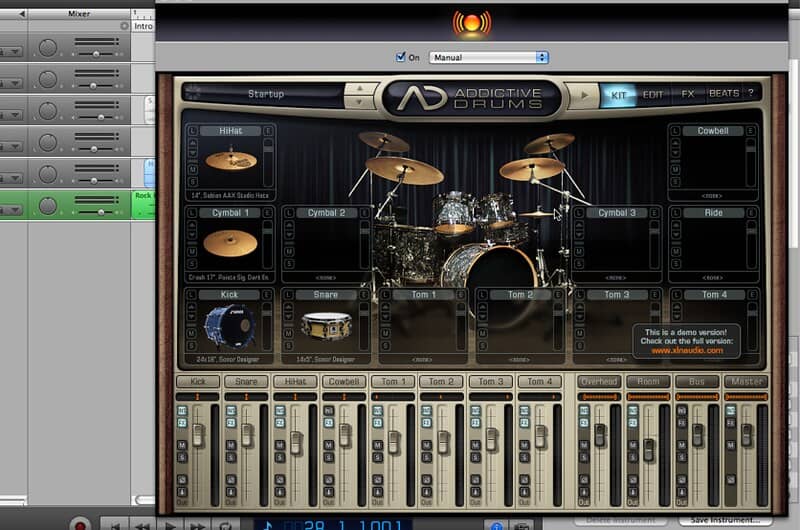
– Addictive Drums 2 — great sounds, easy workflow.
How MIDI recording works:
1. Connect your module via USB (or a dedicated MIDI interface if your module has 5-pin MIDI DIN outputs).
2. Open your DAW and create a MIDI track.
3. Load a drum VST on that track as a virtual instrument.
4. Map your pads to the correct VST sounds. Most modern modules have presets for popular VSTs, check if yours does.
5. Record. You’ll see MIDI notes appearing in the piano roll.
6. Quantize if needed. One of MIDI’s superpowers: if your timing was slightly off, you can fix it without re-recording. Use light quantize (50-70%) to tighten things up while keeping the human feel.
The huge advantage nobody talks about:
You can record MIDI on the cheapest Alesis kit in the world and then run it through Superior Drummer 3 samples recorded at Real World Studios or Avatar Studios in New York.
The kit you play on doesn’t determine the sound you get. That’s genuinely revolutionary for home recording drummers.
Method 5: Recording on Your Phone
I get asked about this constantly, and the answer is yes — you absolutely can record your e-kit on your phone, and it can sound great.
What you need:
– A USB-to-phone adapter (USB-C OTG adapter for Android, Lightning-to-USB or USB-C adapter for iPhone)
– A mobile DAW app
For iOS (iPhone/iPad):
GarageBand is already on your device and is genuinely excellent. Connect your module via USB using the appropriate adapter and GarageBand will recognise it as an audio source. You can record both audio and MIDI this way.
For Android:
Android’s USB audio support has improved significantly. Apps like **AudioEvolution Mobile** or **FL Studio Mobile** are solid options. Make sure your device supports USB audio class — most modern Android phones do.
Third-party options:
Apps like BandLab and Ferrite work well for quick recordings. For MIDI on your phone, GarageBand (iOS) handles it beautifully.
Phone recording tips:
– Disable notifications before recording (obvious but critical).
– If your phone doesn’t recognise the module directly, try connecting the module’s audio output to a portable audio interface, then connect the interface to your phone.
– Use a mic stand phone mount to film yourself at the same time for content creation.
Audio vs MIDI: Which Should You Choose?
This is the question I get more than any other. Here’s how I think about it:
Record audio when:
– You love the sounds in your module and want to capture them exactly
– You’re doing a quick recording for practice review or a social media video
– You’re a beginner and want to keep things simple
– You’re recording for a project where MIDI processing isn’t necessary
Record MIDI when:
– You want the best possible drum sounds (VST >> most module sounds)
– You want the ability to fix timing, swap sounds, or re-trigger drums after the fact
– You’re producing music and want full mixing flexibility
– You’re serious about getting pro-quality results from a home setup
My honest take: If you’re just starting out, record audio. Get comfortable with the process. Once you start caring about the final sound quality, which will happen, switch to MIDI.
The combination of a good MIDI recording and a quality VST is genuinely the most powerful setup available to a home recording drummer.
DAW Deep Dive: Which Software Should You Use?
Let me give you a more detailed breakdown of the main DAW options, because this is where a lot of people get stuck.
GarageBand (Mac/iOS — Free)
The best starting point for most drummers. The interface is clean, it’s already installed on your Mac, and Apple has done an incredible job making it powerful without being overwhelming.
It handles both audio and MIDI recording, has good built-in drum sounds (the Drummer track is genuinely impressive), and works seamlessly with iOS. The only limitation: Mac/iOS only, and it doesn’t support the depth of professional mixing you’d get in Logic or Pro Tools.
Logic Pro X (Mac — $199)
When you outgrow GarageBand, Logic is where you go and the upgrade path is smooth because the two share a similar interface. Logic is what I use in my home studio.
It has exceptional MIDI editing, a huge library of sounds, professional mixing tools, and the Drummer track (which is also in GarageBand) for realistic drum programming. Worth every cent if you’re on a Mac.
Ableton Live (Windows/Mac — $99–$749)
The go-to for electronic music production and live performance. If you’re recording e-drums to use in electronic tracks, hip-hop, or anything production-heavy, Ableton’s workflow is hard to beat.
The Session View is unlike anything else in DAW software. Less intuitive for pure recording compared to Logic, but extremely powerful once you learn it.
FL Studio (Windows/Mac — $99–$899)
Built by beat makers, for beat makers. FL Studio has a distinctive workflow that takes some adjustment but is loved by producers worldwide. It’s excellent for creating tracks around your drum recordings. Get the Producer or Signature edition for the best recording features.
Reaper (Windows/Mac — $60)
Reaper is the hidden gem of DAWs, incredibly deep, fully customisable, and costs a fraction of what you’d pay for Logic or Pro Tools. It has a learning curve but rewards you with extraordinary power and flexibility. If you’re on Windows and want professional results on a budget, Reaper is my top recommendation.
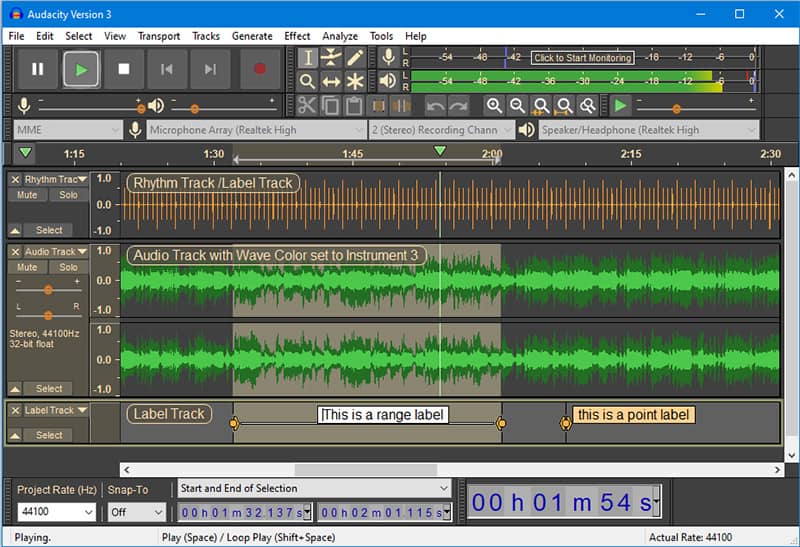
Audacity (Windows/Mac/Linux — Free)
If you just need to capture audio quickly with no frills, Audacity does the job. It’s not a full DAW in the modern sense, it’s more of a multitrack editor, but it’s free, reliable, and easy to understand.
Don’t expect MIDI recording or VST instrument support (plugins need special setup). Use it as a starting point, then move up when you’re ready.
Cakewalk by BandLab (Windows — Free)
Formerly the paid Sonar DAW, now completely free. This is a genuinely impressive piece of software for the price of nothing.
It competes with paid DAWs in terms of features and regularly receives updates. If you’re on Windows and don’t want to pay for a DAW, use this over Audacity.

Getting the Best Sound From Your Recording: Pro Tips
After 20+ years of drumming and recording, here are the things I wish someone had told me earlier:
1. Gain staging is everything
Set your recording levels so that your loudest hits peak at around -12 to -6 dB in your DAW. This gives you headroom. Clipping a digital recording sounds awful and cannot be repaired. Be conservative — you can always boost a clean signal in the mix, but you can’t fix a clipped one.
2. Disable reverb and ambience in your module before recording audio
Your drum module adds reverb and room ambience to the sound. These feel great when you’re playing but are a nightmare when mixing. Before you hit record, go into your module’s settings and pull those effects back to zero. Record dry. Add the effects you want in the DAW where you have full control.
3. Latency matters — use ASIO drivers on Windows
If you’re on Windows and experiencing a delay between when you hit a pad and when you hear the sound, you need ASIO drivers. Download ASIO4ALL (free) or use the proprietary drivers for your audio interface. On Mac, Core Audio handles this well by default.
4. Let MIDI breathe — don’t over-quantize
When you quantize MIDI, you snap your hits to the perfect grid. It sounds tight on paper but can make the performance sound robotic. I use around 50-70% quantize strength to tighten timing while keeping the human feel. The micro-variations in your playing are what make it sound real.
5. Velocity editing is your friend
In MIDI recording, every hit is captured with a velocity value (how hard you hit the pad). Most VSTs translate velocity into dynamics — louder hits, quieter hits, and everything in between. After recording, go into your piano roll and look at the velocity data. Adjusting individual velocities can make a good recording sound great.
6. Record a click track
Always record to a metronome/click track unless you’re deliberately going for a loose, live feel. It makes editing infinitely easier and means your drums will sit in time with any other instrument you record later.
Common Problems and How to Fix Them
My module doesn’t appear as an input in my DAW
→ Check if you need to install a USB driver from the manufacturer’s website. Roland in particular requires this. On Windows, also check Device Manager to see if the device is recognised by Windows at all.
I’m getting latency (delay) when recording
→ On Windows: install ASIO drivers (ASIO4ALL or your interface’s proprietary drivers) and set your buffer size lower. Try 128 or 64 samples. On Mac: lower the buffer size in your DAW’s audio settings.
The recording sounds too quiet
→ Check the gain/volume on your module, the input gain on your interface, and the fader level on your DAW track. All three need to be set correctly.
My MIDI notes are triggering the wrong sounds
→ Your drum module sends MIDI note numbers that may not match the default mapping of your VST. Most VSTs include preset maps for common modules (Roland, Yamaha, Alesis). Find the correct preset in your VST settings, or manually remap the notes in your DAW’s MIDI mapping editor.
The recording sounds clipped/distorted
→ Your gain is too hot. Lower the volume on the module, lower the input gain on your interface, and try again. Aim for peaks of -12 to -6 dB.


FAQ:
How do I record my electronic drums to my computer?
There are two ways of recording electronic drums to a computer, USB or audio. To record via USB, you simply need to connect a USB cable from the back of the drum module into your computer. To record the audio, you’d need to have an interface and connect it to the module via XLR cables.
Both methods would then need to be connected to a DAW on your computer. Some popular free DAWs are GarageBand and Audacity.
USB MIDI recording gives you control over all the sounds of the electronic kit. Audio recording takes the audio directly from the module. You can’t change and move the sounds around.
Can you record with electronic drums?
There have been hundreds of albums that have been recorded with electronic drums, especially in the electronic music scene. It’s often easier to record with electronic drums as you don’t need as much equipment or know-how to do it.
So yes, you can definitely record music with electronic drums. It will just never sound as authentic as an acoustic drum kit will. Some drummers also prefer the feel of acoustic drums when they’re recording.
How do you record yourself playing electric drums?
You would need to follow all the steps that we’ve mentioned above. If you want to have a video to go along with your recording, then you’d need to sync the recorded audio to the video.
You could use your phone or a camera to make the video recording. The next step would be to put the video on video editing software. A good free program to use is iMovie. Once the video is on there, import the recorded audio that you saved from the DAW.
Line the two files up so that you can see the sound waves matching. Once they match, you can delete the audio from the recording. You’ll now have the original video recording that is matched with the high-quality recorded audio.
How do I record electronic drums on my phone?
You can either use a DAW that is compatible with phones or you could use third-party software. You’re going to need a USB to phone adapter for both methods.
DAWs on a phone will work exactly the same as they would on your computer. You simply need to record via USB on the DAW and you’ll be good to go.
Third-party applications work in different ways. Some will allow you to record audio and video at the same time. Others will work similarly to DAWs.
Conclusion
Recording electronic drums in 2026 has never been more accessible. You can go from zero to a real, usable recording in under 10 minutes and with MIDI and the right VST, the quality ceiling is genuinely professional.
Here’s the quick version:
Just starting out?
USB cable + GarageBand or Cakewalk. Get something recorded.
Want better sound quality?
Add an audio interface, record the module’s stereo output properly.
Want professional results?
Record MIDI via USB, run it through Superior Drummer 3 or EZdrummer 3. Nothing touches this setup for home recording.
Recording on a budget?
The gear matters less than you think. A mid-range Roland or Alesis kit + free DAW + free drum samples can get you 80% of the way there.
The biggest mistake I see drummers make is waiting until they have the perfect setup before they start recording. Don’t wait. Get something down today, learn the process, and upgrade your chain as your ears develop and your needs grow.
The great thing about recording electronic drums is that you don’t need the fanciest kit to get a great recording. You just need cables and a computer.
If you want to go deeper into drumming technique, ear training, and building a real practice routine around your kit, check out The Drum Ninja School. Everything I teach there is built around helping you become a more complete, confident drummer. Start with a free trial and see if it clicks.
Keep playing.