How to Set Up a Drum Set

Practical Guide

Intro

Drum sets are one of the most confusing instruments to set up for beginners. They have so many parts and features that make it daunting for a first-timer to set them up. 

When you buy a new entry-level drum set, it will come with everything you need. This includes hardware, drums, and cymbals. If you get a shell pack, it will only come with drums, meaning you’ll need to get hardware and cymbals separately. 

In this guide, we’re going to help you learn how to set up a kit. We’ll explain what all the components are and elaborate on how to construct them. At the end of it, you’ll hopefully have a full drum kit setup that feels comfortable to play. 

How to Set Up a Drum Set

Sabian HHX Evolution Performance Set Review

1. Identify the Parts

The first thing to do when setting up a kit is to lay out all the parts. If you’ve ever built LEGO before, this is very similar. A new drum set will come packed in boxes, with all the components compacted to their smallest forms. 

You’ll need to unpack those boxes and lay everything out clearly. You then need to identify all the parts. Here’s what you will have: 

Snare drum
Rack tom 1 
Rack tom 2 
Floor tom
Bass drum
Hi-hats
Crash cymbal
Ride cymbal
Snare drum stand
Floor tom legs
Rack tom mount
Bass drum pedal
Hi-hat stand
Crash cymbal stand
Ride cymbal stand
Drum throne 

You may find that the drumheads were removed from some of the drum shells so that they could be placed inside larger drum shells in the box. You’ll need to reattach those drum shells using a drum key. 

You tune the drums this way, but don’t worry too much about that at this point. For now, all you need is all the pieces in their full form. 

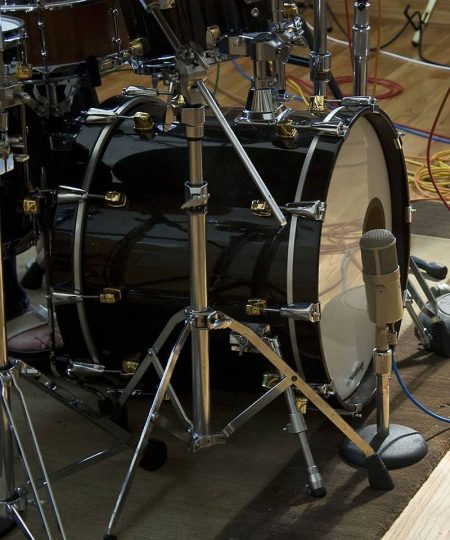
2. Start with the Bass Drum

bass drum

When all the pieces are laid out and assembled, you need to place the bass drum in the desired position in your practice space. When setting a kit up, the bass drum is the center point, and everything is built around it. 

Make sure to position it in a way that provides ample space all around it. If you put it too close to a wall or an object, you won’t be able to place the stands and drums around it later. 

You’ll also need to put it on a carpet or rug. If it isn’t on one of those, the bass drum will shift forward when you kick it with the bass drum pedal. If your floor is carpeted already, you won’t need to worry about that. 

Lastly, make sure the bass drum is positioned evenly. If the legs on the back of it are placed too high, the bass drum will face your body at an angle. It should be resting parallel to the floor. 

3. Adjust the Drum Bass Pedal

Best Double Bass Pedals

Assembling your kick drum pedal is the next step. If it didn’t come preassembled, then you’ll need to attach the chain to the hook that allows the mechanism to work. Once you’ve done that, you can dial in your preferred tension settings. 

If you’re a beginner drummer, don’t worry about tension settings just yet. You’ll start to develop preferences after a few months of playing. 

To place the kick pedal, you need to attach it to the hoop at the bottom of the bass drum. Some kick pedals will have a wing nut that you can tighten to secure the pedal, while others will require you to use a drum key to secure it. 

The last thing to do is adjust the bass drum beater’s height so that it connects with the center of the bass drumhead when you push the pedal down.  

4. Place your Snare Drum

How Much Does a Snare Drum Cost

After the bass drum, the snare drum is the most important piece of the drum kit. The bass drum provides the deep impact sounds, while the snare drum gives the higher, more cutting sounds for backbeats. 

It gets positioned with the use of a snare drum stand. Take your snare drum and place it in between the basket arms of the snare stand. Once it’s there, tighten those arms so that they’re holding the snare securely. 

You should then adjust the angle of the snare with the mechanism just under those arms. It’s better to have a flat snare drum angle so that your stick connects with the drumhead strongly, but some drummers prefer more of a tilt. 

If you’re right-handed, place the snare drum and stand to the left of the bass drum pedal. 

5. Set up the Hi-Hat

Hi Hat Cymbals

Your next move should be to set the hi-hat cymbals up. A hi-hat stand may seem a bit tricky to navigate at first, but it’s fairly simple once you get the hang of it. 

Ensure that the legs are widely spread out, and then secure the pedal by connecting it to the edges of the base. After that, raise the stand high enough so that the hi-hats will be sitting just above the snare drum in height. 

On its own, the stand will have a thin rod coming out the top. You need to attach the hi-hats here with the use of a clutch. The bottom hi-hat can be placed on that rod first, and then you need to attach the clutch to the top hi-hat. 

Once the clutch is secured, you can put the top hat on the rod. Tighten the clutch so that there’s a bit of room between both hats. This will allow you to close them to make a sound with the pedal. 

6. Set the Rack Toms

Setting up the rack toms is quite simple. If you have an entry-level or intermediate drum kit, the chances are high that the rack toms need to be mounted to the bass tom. There’ll be a mounting arm that you need to place inside the bass drum. 

From there, you can mount each rack tom to that mounting arm. This looks a bit different with various drum brands, but the idea is the same across all of them. 

If you have a high-end drum kit, you may need to mount the rack toms to cymbal stands. 

Once the toms are mounted, you should adjust their angles so that you can hit them comfortably when sitting at the kit. Make sure not to angle them too much toward you, as you won’t get enough power behind your strokes like this. 

If you position them at a flat angle, they may be harder to reach. 

7. Set up the Floor Tom

Floor Tom

The floor tom needs to be positioned on the ground to the right of the bass drum pedal. Most floor toms come with three legs that you need to attach them to. Those legs elevate them, and you can adjust the height using them. 

When it comes to floor tom height, it’s best to position the floor tom at the same height as the snare drum. This will allow you to move your hands from one drum to the other very easily. 

You also need to decide on what angle to position the floor tom at. Most drummers prefer a completely flat angle, but you can tilt it slightly if you want to. 

If you have more than one floor tom, the next one can be set up in the same way. You’ll just need to put it further to your left. 

8. Set the Drum Throne

Setting up a throne may just be one of the most challenging things about setting a kit up. The throne itself is easy to assemble, but choosing how far away from the kit it sits and how high you’re sitting is a different story. 

9. Set up the Cymbals

The last component that needs to be set up is the cymbals. Typically, a crash cymbal gets placed to the left of your rack toms. Place it on a cymbal stand so that it doesn’t get in the way of either your hi-hats or the first tom. 

In terms of height, a good start is to place the crash at shoulder level. If you put it too high, you’ll end up reaching for it and putting stress on your rotator cuff. 

The ride cymbal goes to the right of your kit. It should sit between your middle tom and your floor tom. Ride cymbals are quite big, so take some time to position it so that it doesn’t get in the way but also feel close enough to play comfortably. 

If you have another crash cymbal, you can place it on a stand to the right of the floor tom. Any extra cymbals can be placed around the base ones that we’ve already mentioned. 

Different Setups: Choose What Works for You

It’s vital to remember that there are no set rules when it comes to drum kit setup. As long as you’re following the basic principles, you should have a setup that works for you. Some people prefer their ride cymbals to be on the left, while others put their smallest rack tom in the middle. 

As long as you feel comfortable when playing and your drum set positions aren’t detrimental to your playing or physical health, you’ll be good to go!

How to Achieve Perfect Posture

Having a good throne setup is vital to achieving perfect posture. You shouldn’t be sitting too low, and you need to make sure that your back is straight at all times. If you have to bend to play things, your posture will suffer. 

Always be aware of what your body is doing. Regularly record yourself or play in front of a mirror so that you can make adjustments when needed. 

FAQ:

How do you set up a drum set?

You set up a drum set by assembling all the hardware and then attaching the drum shells to it. Everything is placed around the bass drum. The snare drum, rack toms, and cymbals are all held together by drum stands. 

What does a basic drum set consist of?

A basic drum set consists of a bass drum, snare drum, rack toms, a floor tom, hi-hats, a crash cymbal, and a ride cymbal. 

Those are the basic components that you will find on most drum sets. They’re not all essential, though. You can comfortably play a gig with only a bass drum, snare drum, hi-hats, and some sort of crash or ride cymbal. 

What are the 7 parts of a drum kit?

The seven parts of a drum kit are the snare drum, bass drum, rack toms, floor toms, hi-hats, crash cymbal, and ride cymbal

Some drum kits have fewer parts than those, while others have a lot more. 

Conclusion

While it’s daunting, it’s also incredibly fun to set a drum kit up for the first time. The more you do it, the easier the whole process will become. It will also be a lot faster. Drummers who play gigs regularly are experts at setting drums up quickly. 

Remember that there are general ways of setting a kit up, but you don’t need to follow those very strictly. You should position your kit in a way that is comfortable for you. Just make sure to put your drums in positions that are optimal for playing. 

I’m crazy about drums, it’s been my passion since I was 12 years old. I played in numerous bands going through different styles like Rock, Progressive, Pop & Jazz-Rock. After being featured in major music publications (DrumeoGuitar GuitarAudioIssuesMusicThinkTank I started this website to share my knowledge and create a resource for drummers of all levels.

Pin It on Pinterest

Share This

9 Tips
to Get Faster

Subscribe to our ninja mailing list and get a Free E-book!